Unit 1.1 - Camera
B99 VIDEO LINK:
B99 questions and answers:
What was the task you were asked to complete?
The task we were set to complete was to make a replica intro of a series of
"Brooklyn Nine Nine" on Adobe Premier Pro.
"Brooklyn Nine Nine" on Adobe Premier Pro.
How successful were you at completing this task?
I was very successful by completing this task by having a good replica
intro of the actual "Brooklyn Nine Nine" intro. However the only thing my group
didn't get to do was the last shot of the intro where all of us walk at the same time.
What skills did you have to use to complete this task?
The skills I used to complete the task was the use of positioning the coloured
strips where the names go, the use of zooming into the character and the colour
background only.
strips where the names go, the use of zooming into the character and the colour
background only.
In what ways were your skillset challenged during this project?
The use of inverting the the character rather than not being able to invert the
character.
character.
If you were to carry out the production again, what changes would you make?
Make faster decisions rather than having a long decision while having 20-30 min
to create this scene.
to create this scene.
If you were to carry out post-production again, what changes would you make?
Make the camera quality on some clips better for the hight standard.
How did you perform working in a group?
Pretty well but the only problem is that we discussed far too long.
How did you perform working independently?
Very well because I managed to get all of the clips intro one intro with additional
editing skills which allows it to stand out more.
editing skills which allows it to stand out more.
What aspect of the project did you enjoy the most?
The aspect I enjoyed the most was the editing part in Adobe Premier Pro.
How could you apply the skills you learned in this project to future projects?
I can use these skills to then adapt them even more for higher editing skills for
then better quality videos.
Photography basic analysis:


then better quality videos.
Photography basic analysis:
'From heaven to earth, it doesn't stop surprising'.
What aspects of the photograph do you like?
The aspects of this photograph that I like about is the use of different colours that was used in this image to make the photo look more alive.
What aspects of the photograph do you not like?
The only negative part of this photo that I dislike is that the photo is quite basic and there isn't much going on in this photo.

)


2.


1. Focal length
What are the focal length options? The options are: 18, 24, 35, 55
The best one is 100 ASA as it has bigger circles in the frame that make up the picture so when expanded the picture stays higher quality and becomes less grainy.
Which is best for very low light?
200ASA as it is very sensitive to light so having less light is best however the higher Asa rating the grainier the picture will end up when expanded.

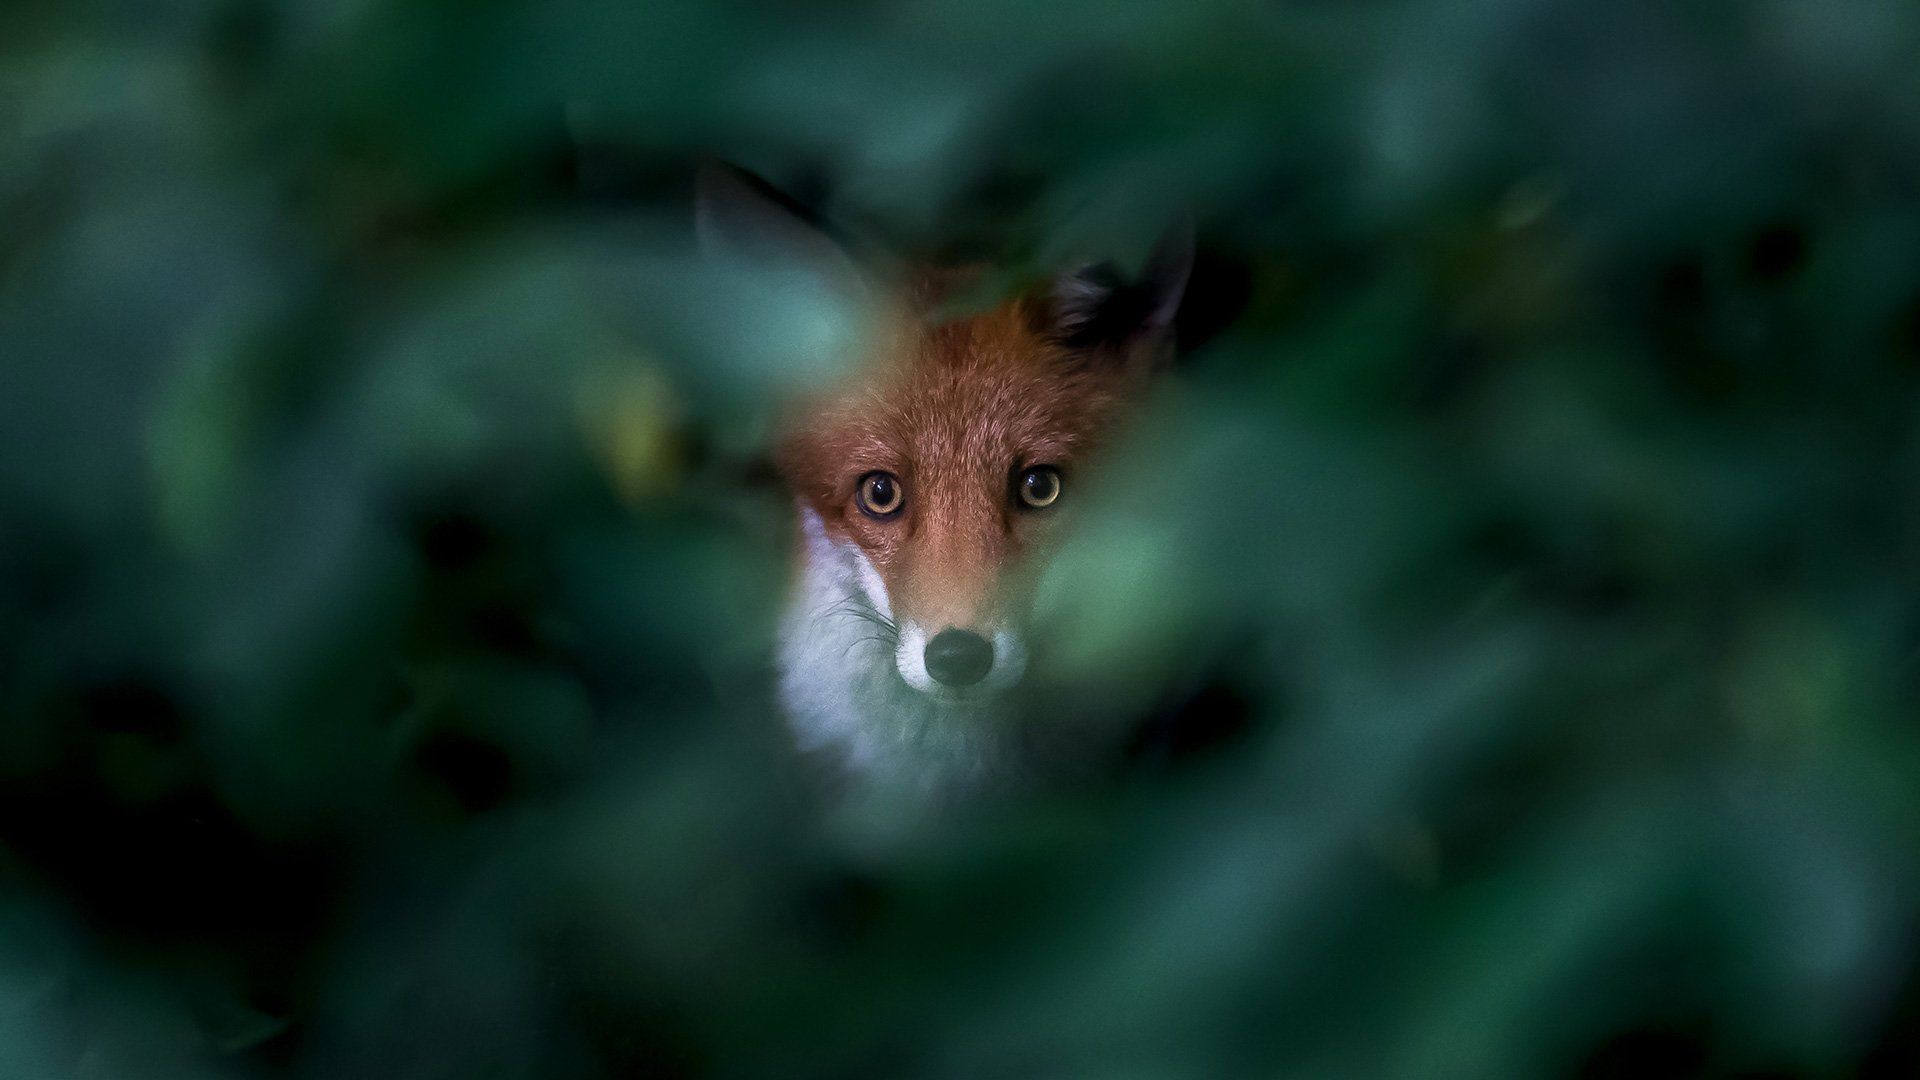
What aspects of the photograph do you like?
The aspects of this photograph that I like is the use of focusing on just the foxes head and everything else is being blurred. This tells us that the most important part of the photo is the fox and nothing else.
What aspects of the photograph do you not like?
The only down side of this photo is that there isn't much going on as its just a fox looking at something yet being the only part that's been focused.
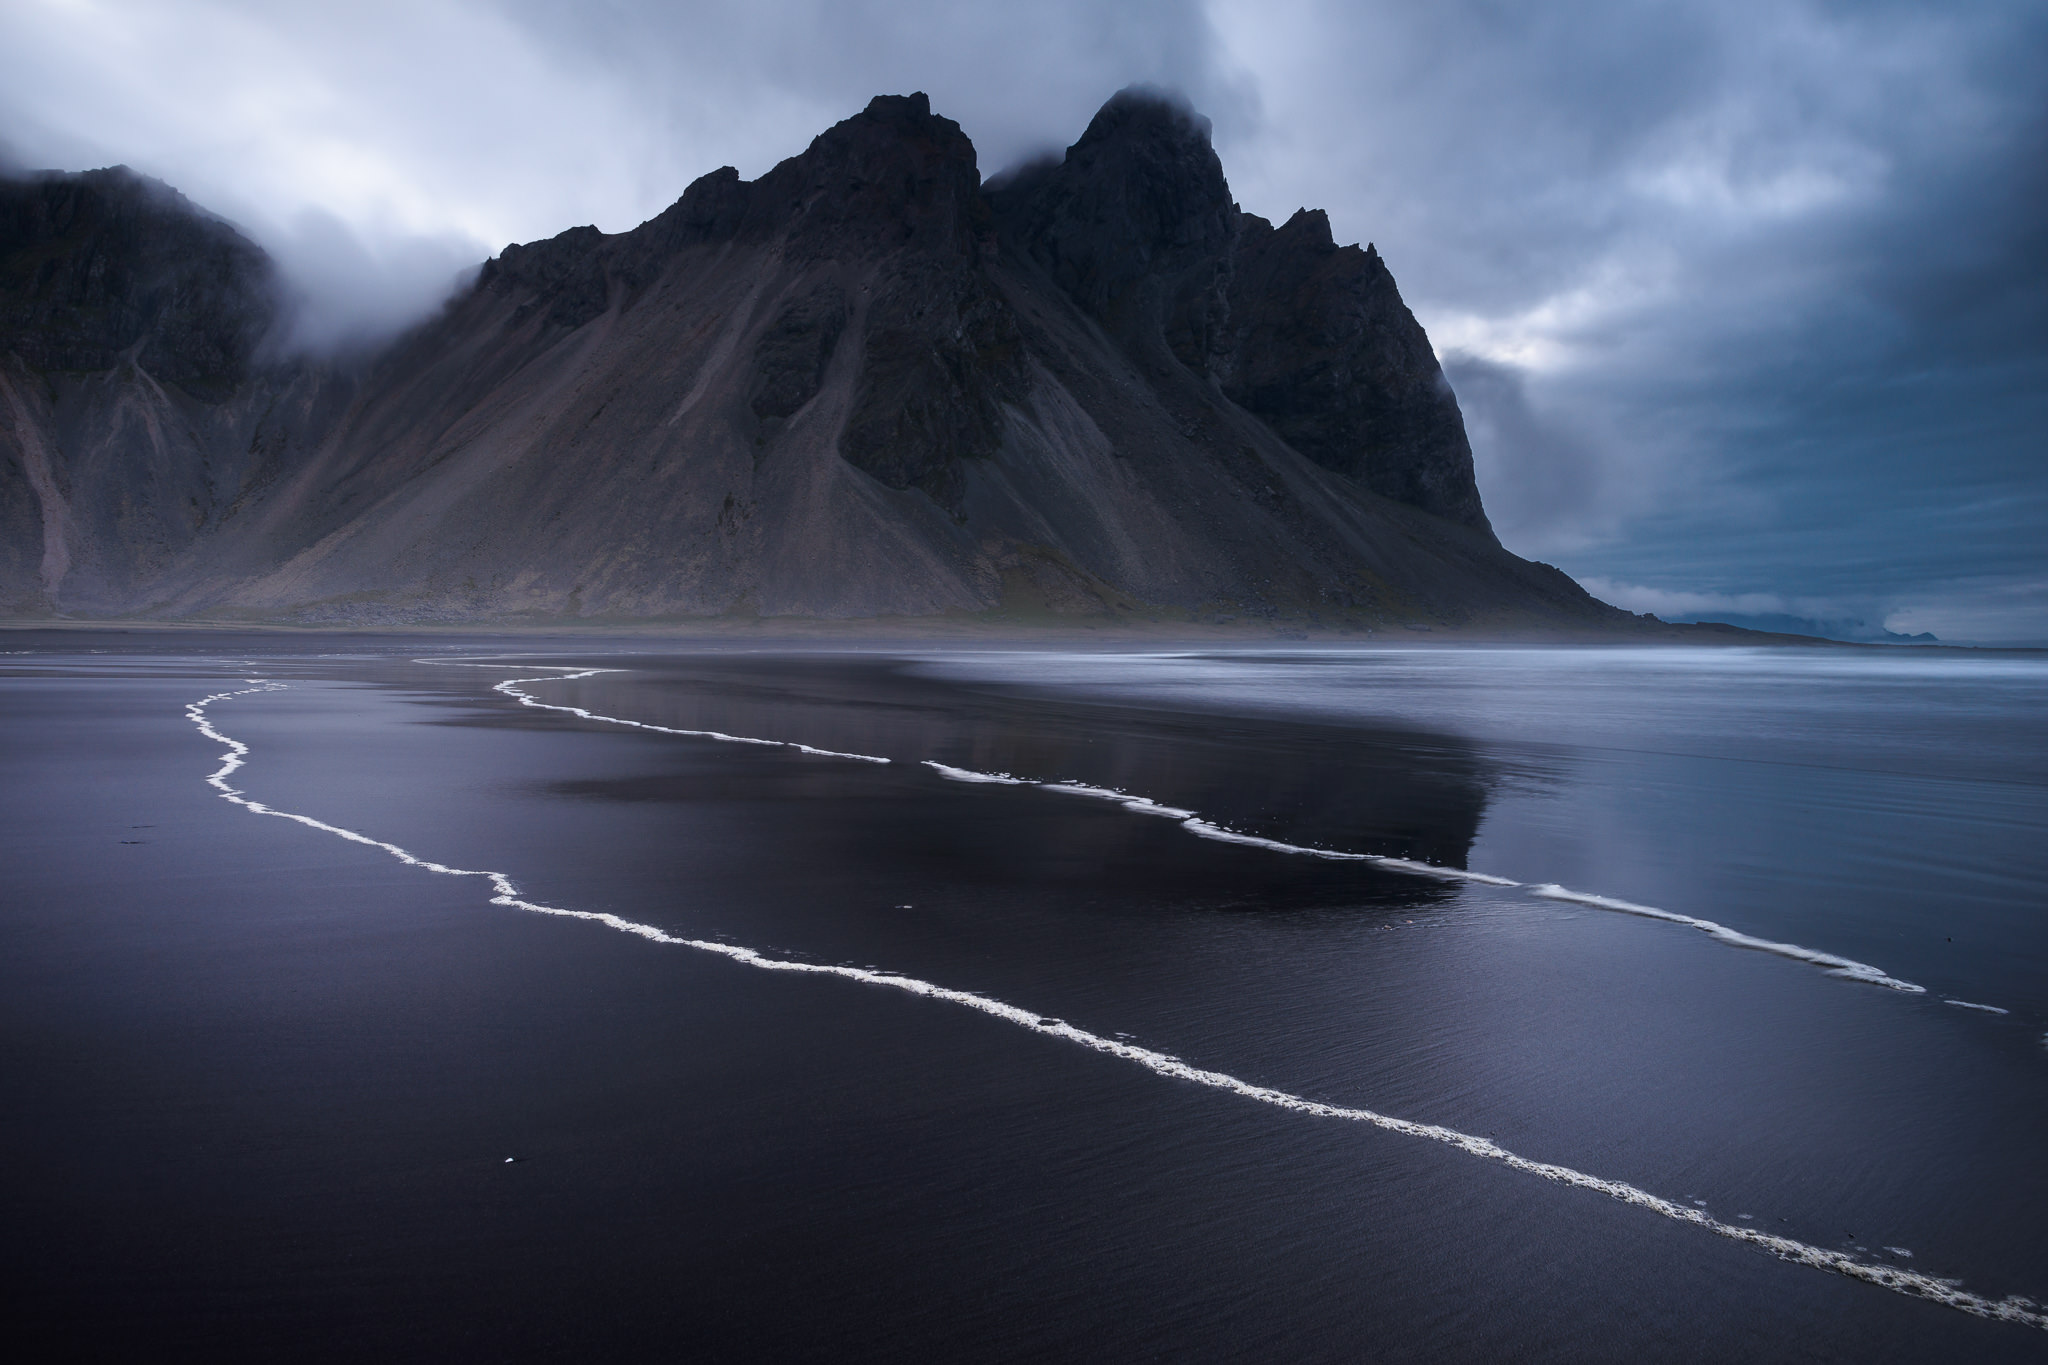
What aspects of the photograph do you like?
The part that stands out for me is the use of perfecting the timing of the waves coming into the sand which makes it look like some sort of crack in the ground in a gloomy environment.
What aspects of the photograph do you not like?
The negative part is that the picture is basic and it also has dull colours which doesn't make us feel very delighted seeing an image like this.
Photography advanced analysis 1:
Credit: Hougaard Malan
Iceland
Purpose:
The purpose of this photograph is to show how well timed the photographer has taken this picture whilst the sun is sun setting behind the icicles giving them a more gold type texture towards the icicles.

Where:
This photo was taken in Iceland at a small island in the frigid North Atlantic Ocean.
Context:
This is located in a cave with icicles hanging down whilst the sun is reflecting into the icicles. This also tells us that the weather conditions are very cold especially right next to the ocean.
Lighting:
In this photograph the lighting has been used whilst the sun is sun setting to give it that extra special effect towards the image.
Framing:
In this photograph the framing is quite up close due to the icicles surrounding the view up close which then makes the people that look at this photo more towards the icicles. A good example of a rule of thirds is right in the centre of this photo where you can see the sun perfectly shining through the middle icicles .
Ethics:
For this type of photo by not editing anything towards a photo like this would be way better upon release because if people wanted to visit such a wonderful place, they would really want to get a picture of them selves as well rather than getting an edited version and not getting a similar type photo if the photo was edited slightly.
Photography advanced analysis 2:
Credit: Chris Burkard
Aleutian Islands Wilderness
Purpose:
The purpose of the taken photograph is to show a shared favourite highlight of his for 2018 whilst the sun is sun rising behind and over the remote volcanic island in Alaska's Aleutian chain. This was a place he dreamt of going for a long time.
where:
This photo is located at a volcanic island in Alaska's Aleutian chain named as 'Aleutian Islands Wilderness'.
Context:
This is located in an open sea where and there is also a remote volcano with snow all over the top which suggests that the weather conditions are cold there. The cloud are also quite dark which could lead to more snow or even rain.
Lighting:
The only lighting that has been used in this photograph is the sun. The sun as light makes the area more natural and is also kind of blocked by the clouds yet making the photograph stand out.
Framing:
In this photograph the framing is at a distance to give it that full view of the volcano and the sun which makes it look more alive again. A good example of a rule of thirds is the top part of the volcano where in this image stands out the most as it seems to be an active volcano whilst the sun rises.
Ethics:
For this type of photo by not editing anything towards a photo like this would be way better upon release as this will still make people believe this could still be an active volcano yet it was juts the sun int the back. This will in fact make people tempted to visit this place to experience it themselves and even get a picture of it for them to keep.
Camera settings photos:
1.
55 focal lens
35 focal lens
24 focal lens
18 focal lens 1/4000.F4.0.ISO Auto
Cloudy, shady and sunlight.


2.
55 focal lens
35 focal lens
24 focal lens
18 focal lens
1/100 ft1.35 ISO 100
Cloudy shade and sunlight


Camera settings questions:


1. Focal length
What are the focal length options? The options are: 18, 24, 35, 55
What different effects can you create? We created different colour mood effects for instance the bright colour gives it that summer effect and the blue ones give it that cold winter effect.
Can you think of a narrative scenario where you might choose a short vs a long one?
For short shots I would use it for still and up close things for detail and for long ones i would use it for instance a car racing by.
2. White balance
How do you change the white balance?
To change the white balance you need to switch to interface where you can change the settings.
Why would you?
I would change the white balance to change the mood of the picture and I would also change it to show different varieties in different shots.
I would change the white balance to change the mood of the picture and I would also change it to show different varieties in different shots.
What are the options?
How do you reach them?
The options we had with our camera were
F3.5 being the lowest option and the highest being f22
Why would you choose one of the other?
By changing the sizes in the interface of put camera settings they should be in the top middle with the a letter before it which will always be F and then a number you can change this with the scroll wheel on the front right side of the camera.
By changing the sizes in the interface of put camera settings they should be in the top middle with the a letter before it which will always be F and then a number you can change this with the scroll wheel on the front right side of the camera.
3. Shutter speed
What shutter speeds are there? Which is best for showing the speed of an object?
The lower the shutter speed the more detail it can pick up from a still image however with a higher shutter speed it can capture a car racing for instance as it wouldn't make the image as blurry as having lower shutter speed.
Which is best for capturing a fast moving object in perfect stillness?
Higher shutter speeds.
4. ISO
Which is best for blowing the image up very large?
100ASA
400ASA
3200ASA
The best one is 100 ASA as it has bigger circles in the frame that make up the picture so when expanded the picture stays higher quality and becomes less grainy.
Which is best for very low light?
100ASA
400ASA
3200ASA
200ASA as it is very sensitive to light so having less light is best however the higher Asa rating the grainier the picture will end up when expanded.
Which is best for very low light where the detail of the image is important, and you want to blow it up large?
400ASA
3200ASA
100 Asa is best as higher numbered asa are more sensitive to light meaning that if a 3200 Asa
photograph was taken in a well lit place the picture would be too bright to even see what the subject
was. Having a low ASA means that it is not as sensitive to the light so that the picture will be better in
situations where there is a lot of light available.
Photoshop skills (Elephant photo, multiplicity photos and collage):


La Haine scene analysis:

La Haine Reshoot video and side by side video:
What genre did you decide to make the scene? (Eg dramatic, romcom etc)
We decided to use drama.
Why did you decide on the scenario you chose?
Because we felt this scenario would of been best for us as the actors could memories the lines easier
than the other scenarios.
than the other scenarios.
Were there any issues with the group?
Yes because no one wanted to do acting and secondly we had to re shoot a couple of times.
Would you work with the same people again (any concerns about specific people tell me in class not
on the blog!)? Yes as I wouldn't mind working with them again.
on the blog!)? Yes as I wouldn't mind working with them again.
Did you know exactly what your role was?
Acting and Clapperboard.
What was it?
For acting I had to act out scenario 2 and for clapperboard I had to use it in every shot for the other
actors.
actors.
Did you perform your role alright? (Were you pleased/were there issues?)
Yes I performed my role pretty good.
How was the group’s timekeeping?
Very good as we got back in class very early and even earlier in other days.
Who was in charge of this?
Tonnam and Yakub.
Who did what in the group?
Alexej(me), Tonnam and Yakub were actors.
Alexej(me) and Simon were clapperboard.
Archie was camera man.
Barren was sound.
Courtney was director.
Time keepers were Barren and Tonnam.
Who was the best in their role?
(Not trying to be rude)
Simon and Alexej(me) were best in their role as they were the ones that were pressured the most in this whole work.(Not trying to be rude)
Looking at the final edit, what would you change if you were to shoot again?
When we shot the scenario for Yakub and Simon, we realised an equipment bag for the sound kit.
Was the brief clear (if not, why do you say that)?
Yes as we all knew what we were doing for our roles.
Did you run through the performances first (blocking them out, rehearsing)?
We rehearsed the performance along the location we were going to shoot.
Did you meet the brief first time around? If not, what was the feedback?
We had to re shoot a couple of times before getting it on point.
Look carefully at the first three-five cuts you made. Why did you make them then?
We've made them this way to show each part more clearly towards the audience by what prop is being
thrown, who is talking and how the person is walking into the shot.
We've made them this way to show each part more clearly towards the audience by what prop is being
thrown, who is talking and how the person is walking into the shot.
What types of cut did you use (look this up here.
https://www.nyfa.edu/student-resources/a-beginners-guide-to-film-editing-vocabulary/)?
We used cut, continuity editing and editing.
https://www.nyfa.edu/student-resources/a-beginners-guide-to-film-editing-vocabulary/)?
We used cut, continuity editing and editing.
What could happen next in the film?
In the next part of this film, the person that only says one thing could start talking their own
views about using phones to show their different views.
In the next part of this film, the person that only says one thing could start talking their own
views about using phones to show their different views.
**WELL DONE!**
Comments
Post a Comment